Ideal Things To Do To Correctly Investing In Outdoor Lighting In Houston

7 Tips To Help You Get It Right When Investing In Houston Outdoor Lighting

With summer now here with us, you most likely are gearing up to enjoying the great outdoors. Your backyard may become your favorite place to chill in when you are at home or when hosting your friends for lunch or dinner. Therefore, the fun should not stop when the sun sets because you do not have any outdoor lighting.

When investing in the outdoor lights, keep in mind that the lighting options are not created the same. Moreover, setting up the lights involves more than installing them on the walls or hanging string lights from the roof. You should strive to create an elegant ambiance, and this demands that you choose the right lighting fixture.

1. Include These Types

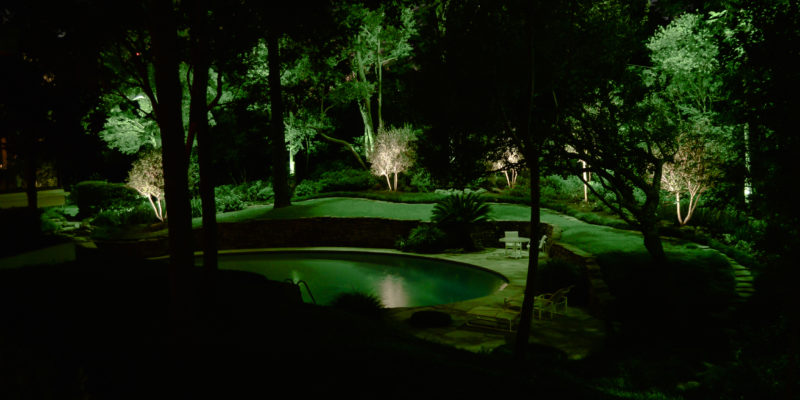
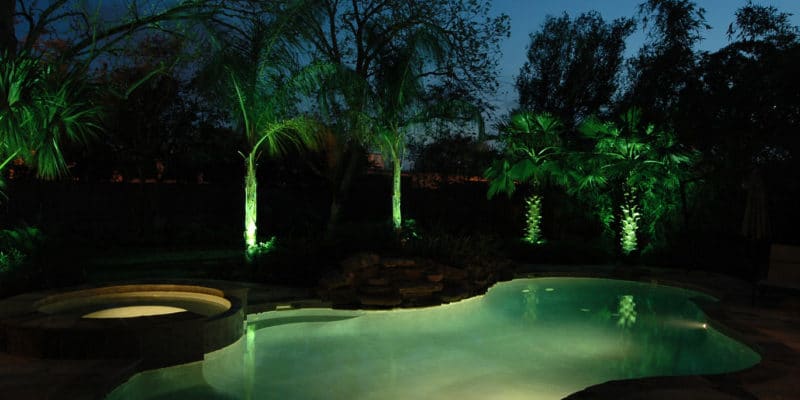
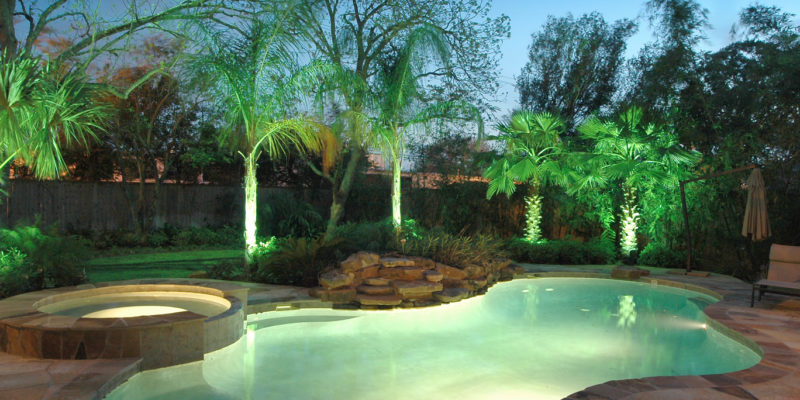
When planning the lighting, you need to account for three basic types: task, ambiance, and accent. That means you need to pick the right kind of lights for each of the three. The task lighting will be the lights you install to illuminate the walkway, deck, driveway, patio, and the security lights. The ambiance lighting will be what you fit on the walls, posts, and string from the roof. As for the accent lighting, you will be working with lights that enhance your landscaping; this can include options such as spotlights.

2. Calculate

Before heading out to buy the outdoor lights, you should know how many fixtures you need and which kind. For this, you will need to get a pen and paper and do some calculations. You will take the square footage of your yard and multiply it by 1.5 to estimate the required total wattage. Therefore, a 100sq. feet area will need 150watts.

3. Make Your Pick In Advance

After doing your calculations and figuring the wattage, you then will focus on the type of lighting fixtures you need. You will take into account their size and installation position before you go to buy them. You will need to draw a template of the layout on paper and use it to determine the placement of each light. For instance, for the patio at the back or the front porch, you will position the wall lights a height that is one-third that of the door.

4. Use LEDs

LEDs that the best investment when it comes to lighting up your backyard. The lights are cost-effective, less energy demanding, and last longer than the incandescent or halogen bulbs. Moreover, LEDs need little to no maintenance.

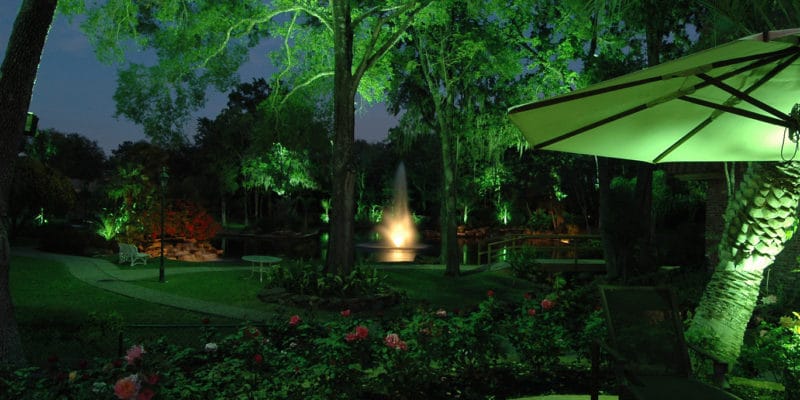
5. Seek Inspiration Inside Your Home

If you feel lost when figuring out the layout plan for the outdoor lights or what to pick, you can get some idea from inside your house and the arrangement of your outdoor space. Look at the garden and how the pathways flow, consider the size and design of your patio and then image what lighting fixtures will accentuate them. If you are thinking of creating a lit area of your outdoor dinners, then get some inspirations from your dining or living rooms.

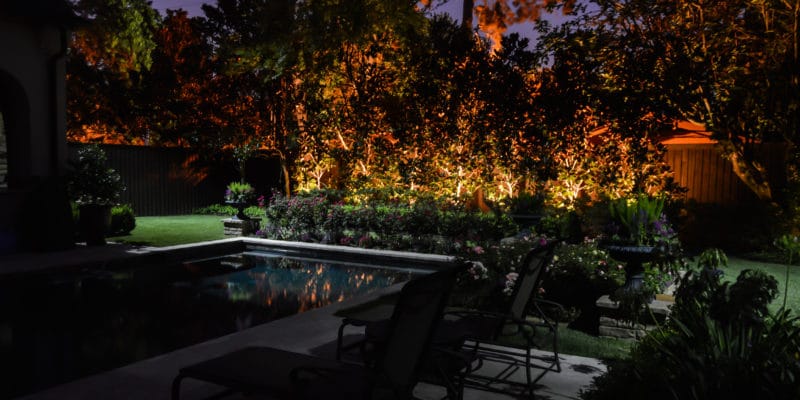
6. Use Subtle Light For Entertainment Areas

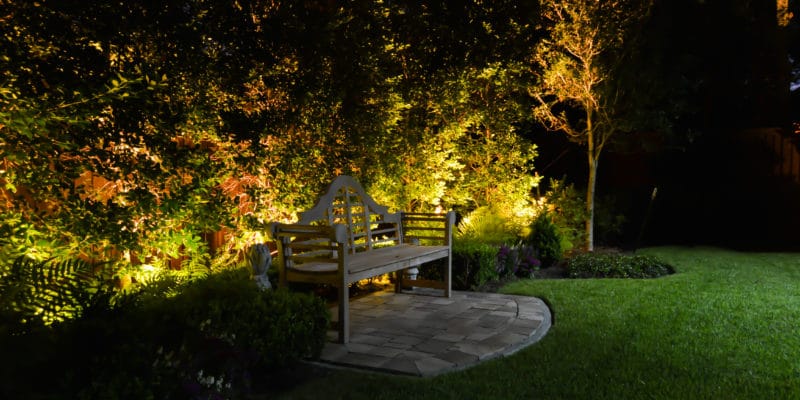
Bright spotlights will be a distraction to your guests when they are seated enjoying their outdoor meal. As such, you should consider installing lamps with a soft glow. Subtlety is the name of the game when it comes to lighting up the outdoor dining areas, and the lights should be installed to give indirect lighting. Pendants, ceiling fans that have light kits, and lanterns are excellent options worth considering.

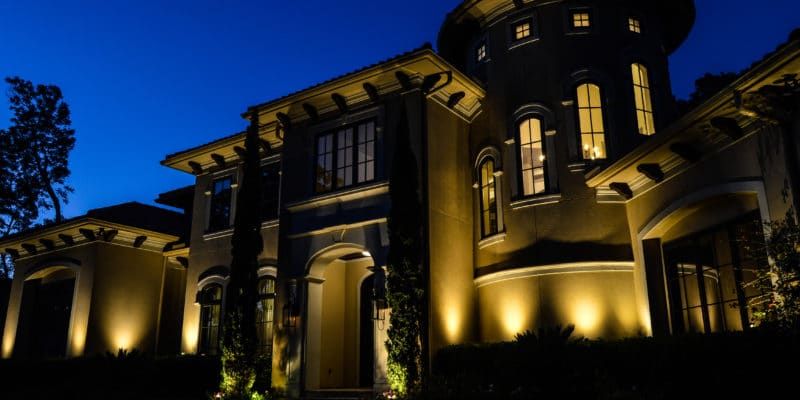
7. Think About Security

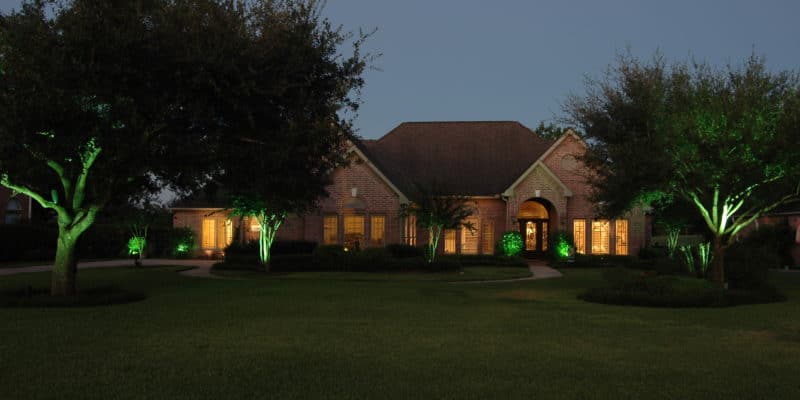
Lastly, remember that outdoor lighting is not just about enhancing the aesthetics of your yard. They also should help secure your home. Given this, you need fixtures that will ensure that all entry points are well lit. For instance, you can install wall lanterns on either side of the garage and a single lamp above the main door to light up the front porch. You can fit spotlights on the eaves of your roof at selected sides of the house that are in the shadows.

If you would like to discover more tips and tricks from Robert Huff Illuminationsvisit our blogCall or contact us today for more information!

Understanding The Effects For Your Houston Outdoor Lighting

Considering The Effects For Your Outdoor Lighting In Houston

You will need full knowledge of the temperatures, nature, types, and sources of your lighting elements if you will use their effects to the maximum in an outdoor location.

Modern lighting technology has become very advanced and now lighting designers can choose between the colors, brightness and even the “heat” or temperature of the light. Because these will be measured in Kelvins, we have lighting sources delivering a warm amber glow at cooler kelvins and those delivering the cold white light at higher registers.

Kelvin Color Temperature Scale

The Kelvin range that most manufacturers and designers use to describe residential lighting is between 2500k and 4000k. As a rule of thumb, you want to use the warmer colors and registers between 2500 and 2700 for illuminating architectural features. The cooler whiter lights and those between 3000k and 4000k can be used to illuminate plants and landscapes.

The Best Color Temperature For Your Landscape Lighting

Color temperatures can be described as how warm or cool they appear to be, or simply put, how far they are on the scale between amber (warm) and white (cool). The right temperature of light can be chosen for the subjects they will be illuminating and the situation they will be placed. There are no rules here, but there are some pointers that can help to achieve certain looks. Sometimes moving things around and testing different effects is the best idea.

One important tip is that bluish, white and cooler colors tend to make a poor choice in an outdoor scenario. This is because these bluer tones on the soft natural tones outside tend to make things look sickly and dead. Instead, choose a warmer color tone, something between 2700k and 3000k LED is the best option. 2700 is a very warm tone and akin to having a glowing campfire in the vicinity that casts a comforting glow on everything around. This is a great way to create soothing, relaxing and comfortable exterior effects.

Some Specific Lighting & Light Suggestions

If you will be lighting outdoor entertainment areas, such as fireplaces, cookouts, and gazebos, use lights at the lowest end of the Kelvin scale. These lights at about 2000k provide the warmest of glows much like the soft glow of a candle or a tiki torch. Located strategically in your entertainment area, this will create an especially romantic tone.

A 4000k artificial light placed high above the tree makes a perfect moon glow that reflects deeply over the foliage and features below. These artificial moonlights come equipped with a glare shield that keeps the light pointed in the desired direction.

Choose the Warm White (2700K). This LED is a lot like halogen-type landscape lighting. The color choice is especially popular for a variety of situations. This is also considered one of the best lighting temperatures as it is especially relaxing and soothing to the mind.

Warm or Natural White (3000K). Slightly cooler than 2700 can be used in a wide variety of situations for a more refined and sophisticated look, many modern landscapers prefer this temperature for accentuating greens in vegetation.

Cool White (4000K) is very blue compared to the popular 2700k, this option is chosen to illuminate vegetation that is already blue in color and this includes many types of grass, shrubs, and trees like the blue spruce and juniper.

If you would like to discover more tips and tricks from Robert Huff Illuminationsvisit our blogCall or contact us today for more information!

Brilliant Ideas On How To Design Your Houston Landscape Lighting

5 Easy Steps For Designing Your Landscape Lighting In Houston

If you are looking for that creative way of adding some beauty, drama, and allure to your yard and home garden, why not consider landscape lighting? Below are five things you can do to come up with a distinctive, functional, lighting design that illuminates the best features of your home exterior at night.

1. Form Ideas For Your Landscape Layout

Take a stroll in your yard during the day, taking a keen look at key focal points and then repeat the same when the sun goes down. The idea is to find out how well that water fountain, stoic oak tree, those juniper shrubs and the best of blossoms appear in the veil of night. You also can check out the wall with its fine travertine capstones and the majestic faced looks. Such focal points in your garden will help you come up with how you will install the lighting so align with the flow of the layout of your landscaping. The lights can define these features during the night, and some can also be installed to liven up other zones such as the deck, porch, or driveway.

2. Sketch The Landscape

Once you have an image in your head of what you want to achieve when landscape lighting, it is time to put it down on paper. Sketch it starting with the perimeter, then the buildings, the paths and driveway, decks, vegetation, and any decorative features you have in your garden. Ensure that you include all the focal points you identified, detailing their location and dimensions. Do this in an existing landscape lighting so that you can determine whether you will need 12V or 120V landscape lighting systems.

3. Select The Lighting Fixtures

Every zone of the exterior of your home may have unique attributes and thus require the right lighting. You will, therefore, have to consider two things. The size of your garden in relation to the lighting layout and the existing lighting systems that you leverage. When selecting the fixtures, options for this can range from in-ground lights to accent and floodlights, among others. Robert Huff Landscape Illumination offers an array of options that account for elements such as beam density and width, and illumination color.

You can have these fixtures from Robert Huff Landscape Illumination in either 12V or 120V systems made in k-alloy aluminum or solid die cast brass with both finished in bronze for enhanced protection against marine grade environments as well as corrosion in wet areas.

4. Fixture Spacing

For installation, the recommended spacing for the lead wire should be 6ft with room left for adjustments on the site.

5. Wire Runs, Power Supplies, and Final Layout

The last step is bringing what you have on paper to life. For a 12V low-voltage landscape lighting system, you will need several runs of wire from the main transformer to the lighting fixtures. It is possible to have your entire system powered from a single source, especially if you have a transformer that’s connected directly into a standard receptacle electricity outlet.

However, how big of a transformer need will be subject to the number of lighting fixtures used and their wattage demand. The transformer should ideally have a capacity of 75watts to 600watts. And when installing the landscape lighting, remember to leave some room for future expansions, such as adding a new garden feature or planting a tree, so that you can also highlight it with the existing fixture. It will eliminate the need for revising the current landscape lighting setup whenever you bring in something new into your yard. You also should consider installing a timer for controlling the lights based on the time of the day; automated photocell fixtures can also suffice.

If you would like to discover more tips and tricks from Robert Huff Illuminationsvisit our blogCall or contact us today for more information!

Understanding The Different Types Of Garden Light In Houston

Houston Garden Light Types And Ways To Use Them

Garden lights are available in various styles and forms, and different outdoor areas in your garden can benefit from specific types of outdoor lighting.

Here is a guide on the different garden light types and the spaces that they usually work the best in.

1. Garden Spike Lights

The spike lights come mounted on short spikes that are pushed inside the ground at desired locations. They are available in solar power, battery or run off mains, giving you the choice to select the option that matches up to your requirements.

The garden spike lights work well around or in lawns, paths, and flowerbeds.

2. Garden Bollard Lights

The bollard lights look very similar to miniature versions of street lights. These lights are suitable for larger outdoor and garden spaces. They come in a variety of styles and sizes.

In addition to deciding what style and size you need, it is also important to consider the way the light will be emitted. Some of the bollards give off 360-degrees of light, making them perfect for wide and open spaces.

Garden bollard lights work well for wide garden paths, driveways, and lawns.

3. Outdoor Spotlights

Spotlights are usually mounted in elevated positions onto trees or walls. They are usually either angled downwards, or you can position them on spikes where they can be level or pointing upwards. These lights emit wide light beams that offer illumination for larger areas.

The spotlights are typically battery powered or run off mains, yet they also come in solar powered versions. The solar-powered spotlights do not offer a light output that is high.

Outdoor spotlights are perfect for illuminating areas such as lawns, driveways, and paths from above, or walls, bushes, and trees from ground level upwards.

4. Garden Wall Lights

These lights differ from the spotlights as these are light fittings that are decorative which provide a light source to outdoor areas while providing an aesthetic appeal at the same time. The majority of these lighting options are mains-powered, yet they do also come in battery and solar-powered variations.

5. Outdoor Floodlights

The floodlights work on emitting bright beams of light over a wide area and are typically used in the form of a security light along with PIR sensors.

In general, if you use a floodlight in your garden it will eliminate any effects associated with another lighting you have used. However, you can use them like spotlights when you position them on the ground.

6. In-Ground Lights

The in-ground lights are a type of spotlight, but the lights are embedded inside the ground, while the face of the light sits flush at the surface.

This type of lighting option is more commonly used for path and driveway edges. You can also use in-ground lights when you install them horizontally into walls and steps.

7. Deck Lighting

The deck-lighting fittings is another version of lighting which is very similar to the in-ground light fittings. They are shorter as they fit into the wood instead of the ground. You can use this lighting type as an in-ground light, in areas such as rockeries or small flowerbeds.

8. LED Candle Lights

Candlelight is perfect when you would like to create a cozy and warm atmosphere at night. LED candle lights offer a very real effect and them last far longer than using real candles. They are also not affected by outdoor elements such as rain or wind. This lighting works well with water features, along path edges or even with your favorite patio furniture.

9. Lantern Lights And String Lights

Lantern and string lights are generally used for decoration and work well along walls, gazebos, tree branches, and bushes. You can choose from solar-powered or battery-powered lights if you require a more versatile and affordable solution, or you can use mains-powered when using this lighting on a more permanent basis.

If you would like to discover more tips and tricks from Robert Huff Illuminationsvisit our blogCall or contact us today for more information!

Great Suggestions To Plan & Purchase Your Houston Outdoor Lighting

A Complete Guide To Planning & Purchasing Outdoor Lighting For Your Home In Houston

When designing lighting for an outdoor space, it is important to not only think about how it will look but also how it will function. The information below will help you purchase light fixtures that not only enhance the appearance of your home but also help you get more out of your outdoor space.

Three Benefits Of Outdoor Lighting

Outdoor lighting provides a number of advantages. Understanding these advantages will help you come up with an effective plan for your lighting needs. Here are three benefits that this type of lighting provides:

1. Create A More Beautiful Home

Outdoor lighting can have a dramatic impact on how attractive your home is from the street. Small touches like path lights or post lights can go a long way toward making your home seem more inviting. To get the best results, choose more than one area to install the lighting. Creating layers of lighting like this add depth and character to your outdoor space.

2. Add A Sense Of Cohesion To Your Home’s Exterior

Carrying the same style of lighting throughout your entire landscape can help unify the space, creating a consistent look that enhances the appearance of your home.

3. Create A Safer, More Secure Home

When designed correctly, a good outdoor lighting plan will enhance your home’s security and make your outdoor area safer after dark.

Selecting Lighting For Your Outdoor Space

Outdoor lighting comes in a wide range of styles, each suited to different applications. Some of the most popular options are listed below.

Wall-Mounted Lights

Suitable Locations: Decks And Porches, Outdoor Patios, Entrances, Near Garage Doors

These light fixtures are designed with a flat back that allows them to be mounted directly on a wall. They are typically mounted near entryways or in other areas where extra light is required. With many attractive design options available, these sturdy lights are ideal for lighting up the exterior of your home.

Ceiling-Mounted Lights & Pendant Lights

Suitable Locations: Porches Or Patios With Roofs

These outdoor lights are designed to be mounted on a ceiling, making them a great choice for porches or patios with roofs. Even though they can withstand damp conditions, they shouldn’t be mounted in locations where they are exposed to the rain.

Pier Mount Or Post Lights

Suitable Locations: At The End Of Sidewalks Or Driveways, Decks, Patios

As you might guess from their name, a post light is designed to be attached to the top of a post. These lights are typically rated for wet locations, meaning that they can be placed in areas that get direct rain. That means that they can be installed in unprotected areas like at the front of the driveway or near the edge of the sidewalk.

Each light fixture has unique post requirements in terms of both size and style. When shopping, always read the post requirements carefully.

Pier mount lights are similar to post lights. The primary difference is that they are meant to be installed on top of walls or columns rather than posts. In some cases, you can purchase adapters for post lights that allow them to be installed on walls or columns instead of standard posts.

Security Lights

Suitable Locations: Near Sidewalks Or Garages, Close To Entrances, In Out-Of-The-Way Areas Like Alleys

To enhance your home’s security and to create a safer outdoor environment, security lights with built-in motion sensors are the way to go. When activated, these lights flood the entire area with light, helping to drive any potential intruders away.

From a safety standpoint, lights with motion sensors can also be beneficial. For instance, mounting a light that turns on automatically near an entryway makes it easier to see where you are going so you are less likely to trip.

Landscape Lighting

Suitable Locations: Flowerbeds, Gardens, Close To Water Features, Near Trees And Shrubs

Low-voltage landscape lights operate independently from your other outdoor lighting. Path lights, spotlights, and floodlights can be placed in strategic locations around your yard to enhance your landscaping, drawing attention to key focal points in your yard.

Choosing Outdoor Lighting That Is Sized Correctly

Wall-Mounted Lights For Front Porches

The wall light that is installed closest to your front door is usually one of the primary focal points after dark. With so much at stake, it is important to choose a light that is sized correctly. Here are some tips that should help:

  • If you are installing a single light fixture, choose a fixture that measures about a third of the total height of your front door.
  • If you are installing two separate light fixtures on either side of the door, you can choose fixtures that are much smaller. Typically, fixtures that measure about a quarter of the door’s height are appropriate, although you may want to go with slightly bigger light fixtures if you have double doors on the front of your home.
  • One of the biggest mistakes that homeowners make is choosing a light fixture for their entryway that is undersized.
  • If you find a light fixture that you like, try cutting out a piece of paper in the same size and shape. Tape it to the wall next to your door. Then walk out to the front sidewalk or street to see if the size is appropriate.

Ceiling Lights

For overhead lights, the size of the light fixture should be proportional to the size of the space.

Hanging lights should only be used in areas where there is enough overhead clearance.

In spaces where the ceilings are lower, flush-mount ceiling lights are a better option.

Pier Mount or Post Lights

The size of the fixture usually depends on how many light bulbs it uses.

Post-mounted lights typically measure about 7 feet (84 inches) tall.

Avoid Adding Too Much Lighting

When it comes to outdoor lighting, less is more. Low wattage bulbs are usually the best choice for outdoor spaces. Avoid exceptionally bright bulbs since they can be too harsh when used outside the home. Our outdoor light fixtures either come with their own bulbs or include helpful recommendations regarding the best type of bulbs to use.

Overnight & Security Lighting

Evaluate the outside of your home after the sun goes down. Are there any areas that are poorly lit? If so, installing sturdy lights could deter thieves or intruders.

Lights with motion sensors automatically turn on when anything moves near them. This makes them the perfect choice for security lighting. They also are beneficial when mounted near walkways since they make it easier to see where you are going.

Dusk-to-dawn lighting usually comes equipped with photosensors that are designed to detect how light or dark it is outside. This allows the lights to automatically turn themselves on or off, depending on whether it is day or night. The benefit of using lights like these is that you don’t have to think about turning them on or off yourself.

You can also find dusk to dawn lights that incorporate motion sensors in their design. Fixtures with these features come in a wide range of styles for outdoor spaces.

Choosing Lighting That Is Properly Rated For The Location

Light fixtures for outdoor use are typically either rated for damp or wet locations. It is important to understand how these ratings differ.

Wet location light fixtures can be used in areas where they will be exposed directly to rain or other types of inclement weather. Most wall-mounted lights, motion sensor lights, and post lights are wet rated.

Damp location light fixtures, on the other hand, should be used in areas where they are not directly exposed to rain or other types of moisture. Examples of these types of lights include hanging lights or ceiling lights.

If you would like to discover more tips and tricks from Robert Huff Illuminationsvisit our blogCall or contact us today for more information!

Bright Ideas Which Are Best For Your Houston Garden Lighting

Your Perfect Guide To Garden Lighting In Houston

Lighting that is well-planned can really help to enhance your outdoor area, increase visibility and create a pleasant atmosphere that provides you many hours of enjoyment.

Create Your Lighting Plan

Lighting can truly make or break the garden, so make sure you take the time to plan precisely what type of illumination you would like to have and where you want to put it.

Identify Important Features

Make a rough plan for your garden with all of the key features marked. Identify any features you would like to enhance – steps, a tree, a pond – and those you might want to kept hidden such as an old shed.

Stay flexible: a good lighting plan will combine fixed lights along with lights that are easy to move in order to accommodate plant growth and the changing seasons. Consider how you can create various lighting effect in your garden.

Outdooring lighting should always be fluid, and different kinds of lighting will create different effects throughout your garden:

  • Downlighting can be great for throwing light on a decked area or patio or for illuminating doorways. Smaller downlights will be able to pick out specific features or plants, and small downlights that are attached to the bottom of low-lying hardscaping such as windows and benches can define areas by providing an attractive and subtle glow.
  • Uplighting can illuminate a mature tree, a statue or other big objects from below to produce a dramatic effect.
  • This effect can be created by putting spotlights on both sides of a feature.
  • Another way to help an object stand out is to use spotlights. An uplight or directional spotlight can be positioned a distance away from your feature to achieve the effect.
  • Washing will create a soft glowing effective or a complete hedge or wall by placing a light at the base of the object.
  • Shadowing will project a very interesting feature on a fence or wall by angling the spotlight from its foot.
  • Grazing can draw attention to interesting stonework by placing uplights next to it.
  • With mirroring, a feature is lighted on the far side of a nearby body of water in order to reflect the feature’s image in the dark water.

When using outdoor lights, be sure to not create too much glare. For example, lights in the bottom part of your garden should not be pointing directly at the decking or patio where they should overwhelm people who are sitting there. You also don’t want to have sunken lights that point upward directly.

Safety First

When it comes to exterior lighting, the first priority is to ensure that your garden is safe.

Illuminate Any Hazards

Ensure that any potential tripping hazard is always well lit, which includes any level changes, such as low walls or garden steps. Recessed lights have a tendency to work well in those areas, by providing low-level lighting to lower the risk without being too intrusive.

Take The Necessary Precautions

If you decide to install your own garden lighting, be sure to follow the important safety steps below:

– Switch off the main power.
– Confirm that it is safe to work on the circuits by using a socket tester.
– Protect circuits by using a hi
– Run all of the cables underground (to a depth of at least 450mm if under a path or patio, and 750 under flowerbeds or lawns).
– Use a socket tester to check all of your finished work before using the lights.

If you would like to discover more tips and tricks from Robert Huff Illuminationsvisit our blogCall or contact us today for more information!

Some Important Tips For Your Indoor & Outdoor Lighting In Houston

Some Of Robert’s Houston Outdoor Lighting Tips

Indoor

Hall & Foyer

Welcome your guests and make a grand first impression with a well-lit entry foyer or hall. Choose a correctly sized lighting fixture for the area while keeping in mind that the bottom of the fixture should be at least 7 ft. from the floor. this will also help you determine whether you want to use a chandelier, flush-mount, or pendant.

When sizing a pendant or chandelier for your foyer, be sure to ass the width and length dimensions together and convert them into inches. For example, a 10 ft. by 10 ft. area would be best illuminated by a 20-inch-diameter fixture (10 plus 10 equals 20). You can use this formula in other rooms where you plan on hanging chandeliers.

If it’s a 2-story foyer featuring a large window above the front door, then it’s best to place the chandelier at the center so that it can be seen from the outside. For foyers that are extra-large, scones are more recommended and these should be installed at about eye-level, ideally 66 inches from the floor.

Dining Room

The place where you serve dinner should be as tasteful as your meals. Create a grand atmosphere by layering the light with wall scones and a chandelier placed in a way that enhances the architectural details like a built-in archway or china cabinet.

With the formula described above, calculate the size of your chandelier or the diameter of the chandelier at three quarters the width of the dining table. Ideally, the bottom of the chandelier should be about 30 In. To 32 In. above the top of the table.

Kitchen

Create a functional and comfortable space in your kitchen by combining lighting. Consider having a flush mount ceiling fixture complemented by undercabinet pendants and/or fixtures. Keep in mind that the pendants need to be placed such that the bottom of each fixture is 28 inches to 34 inches from the work surface.

Bathroom: Single-light scones can be used in small powder rooms to illuminate the room. For larger bathrooms, you can include a number of different kinds of lighting fixtures. Consider mounting a bath fixture directly above the vanity mirror to achieve horizontal illumination. They should also be installed about 75 inches to 80 inches above the floor. For double vanity setups, each sink needs to have its own source of light.

Outdoor

Curb Appeal

This is the first impression that other people will have of your home as seen from the street. As such, you need to make the most of it, whether you’re a homeowner welcoming family and friends, or a builder looking to market a home for a sale.

The exterior light fixtures are some of the first things that other people notice at the first impression. Aptly styled and sized fixtures will add on to the curb appeal, safely guide the visitors to your door, and provide a warm welcome. The key factors to consider when choosing them to include color, size, and style.

Size

One of the biggest mistakes people make when choosing their outdoor lighting is going for fixtures that are too small. If you are replacing already existing fixtures, don’t assume that the original ones were the right size, to begin with – some builders tend to use small fixtures to save costs.

Lighting fixtures will only look about half as big on your house when they’re viewed by the street as they do in the showroom. So, when choosing between two sizes, the larger one is almost always the better choice.

The front door it a very important area. As such, it should have the biggest and the fanciest light fixture on your house. Don’t let the secondary fixtures at secondary entrances, such as the garage fixtures, upstage the fixtures around your front door.

A good rule of thumb is to make sure the fixture on the front door is 1/3 of the height of a single door, and 1/4 the height of a double door – one on each side. You can cut a piece of cardboard to shape and then hold it up to your house to help you visualize the size better.

Color

It’s important to choose a color that complements the color scheme of your outdoor décor. Bronzes are quite popular with earth tones. We do offer a number of different variations of bronzes from light to dark, including black coral, architectural bronze, bronze, black gold, marbleized mahogany, and burled walnut.

Black is apt for many situations, though bronze is usually preferred when using dark brown trims and accents. Our stone finish is featured in the black family, though it has a hint of grey rubbed on top, which makes it ideal when the bronzes are inappropriate and pure black is too strong. White can be rather striking on a dark bodied house with white accents or trims.

Style

Many contemporary homes don’t have a particular style, as they incorporate different elements of different styles. When choosing a style for your outdoor light fixtures, be sure to pay attention to the main architectural features of your home and the choose fixtures that will complement these features. Get fixtures for your front door simply because it’s the most important door in your home. You can then choose the rest of your outdoor fixtures from the same family of style to maintain consistency.

What about the light intensity? Go for 60W to 75W per fixture or about 20W for compact fluorescent (CFL), which is usually recommended for decorative post lanterns and exterior wall fixtures. Many fixtures on our portfolio are rates for more than 60W. This rating represents the maximum safe wattage allowed, and not necessarily the wattage that’s most appropriate.

Using bulbs that are brighter than necessary will detract from the fixtures as they increase the total glare. The glare will be much worse when you have fixtures featuring clear glass. Focus more on the size and style of the fixture when making your decision, and only use the wattage you need.

Mounting Height

Wall-mounted outdoor light fixtures should ideally be installed slightly above eye level, for houses roughly 66 inches above the threshold. If your house has a transom or taller than normal doors, you might need to install fixtures that are a little higher than 66 inches. You should not install fixtures such that the top extends above the top of the door.

We provide several kinds of fixtures where the body of the fixture is low in respect to the junction box in order to accommodate situations where the junction box might be too high.

Specific Situations

Front Door

The most popular way of lighting the front door is with a pair of lighting fixtures, one on either side of the door. Having a fixture on only one side of the front door can also be done if the architecture or space dictates. If you’re only using one fixture, ensure that it’s installed on the same side as the doorknob, so that your visitors’ shadows won’t be cast on it when opening the door.

If the front door is under cover such as a porch, you might want to consider hanging a lantern instead. Choose fixtures that are about 1/3 of the height of the door when you opt to use one fixture, and 1/4 the height of the door if you’re using two.

Garage Doors

Use a lantern on either side of the garage door or one lantern on top of each door based on the door style and the available space. Choose fixtures that ideally match the front door but are a bit smaller or lesser important looking. The fixtures you install on your garage shouldn’t upstage those installed on the front door.

Back Doors

Here, don’t skimp. Go for fixtures that complement the décor on the rest of the house, and are not small. Using small, cheap fixtures won’t look good anywhere, and will actually detract from your patio accessories and furniture.

Post Lanterns

Go for post lanterns when the light from the front door isn’t enough to light up the parking area. Choose post lanterns from the same family as the rest of the exterior fixtures, and be sure that they are large enough. Post lanterns will look even smaller than the wall fixtures when they’re viewed from the street.

Patio/Deck Lighting

Post lighting fixtures can be installed all around the perimeter of the patio or deck using pier mounts on the wall or railing, or even standard posts installed from the ground. Certain fixtures with low-watt bulbs (between 25W to 40W) will look great and give out a more comfortable light than a single fixture with a bright bulb.

Bright bulbs placed at the eye-level will by unnecessarily glary, and will generally be offensive to you and your guests around the patio.

Other Considerations

Energy Savings

With most of our fixtures, you can use energy saving bulbs.

Dark Sky

Many states and cities are increasingly passing the “dark sky” ordinances in order to control the amount of light pollution. We provide a large selection of fixtures that direct almost all of their light downwards to adhere to these ordinances and address these needs.

Construction Material

Most of our fixtures are made from cast aluminum, which is quite a durable material for most parts of Northern America. If you’re seeking greater durability and prevention of corrosion and rusting, there are other available alternatives.

For engineering and design reasons, some incidental parts have to be made from certain materials. And since our products are often exposed to harsh weather conditions, we aim to only use materials that provide good value and durability.

Maintenance

Exposure to UV rays from sunshine will wear the exterior lighting fixtures quite fast. Other major culprits include airborne pollution and bird droppings that settles as grime and dust. For best results:

  • Wipe down bird droppings and other spills off the fixtures immediately you spot them using plain water on a clean, soft, wet cloth.
  • Wipe the fixtures once or twice a year.
  • Polish your fixtures using silicone car wax after every cleaning.

All Robert Huff Illuminations outdoor lighting fixtures are either ETL or UL listed for wet and damp locations. A fixture with a wet location listing is required when water and/or other liquids splash, drips, or flow on or against the fixtures. You can always use a wet or damp listing outside.

Call or contact us today if you require any information. Please feel free to visit our blog for more related articles.

Let Our Houston Outdoor Lighting Experts Teach You About The Different LED Bulbs & Their Temperatures

The 5000-Lumen SANSI Bulb is The Brightest Of All The LED Bulbs: Our Houston Outdoor Lighting Company Tells All

General Usage

The SANSI LED 40W light bulb features a rating measuring 5500 lumens. That’s usually equal to incandescent bulbs rated at 350 watts. It has a ‘daylight’ quality, also known as a light-temperature rating, which measures at 5000K. At the time of writing, this particular LED bulb was selling for $49.

The Brightest Option For Warehouse Exteriors At 5000K Temperature: This bulb is rated at 29289 lumens with a price of approximately $170.

The Brightest Option For ‘Warm White’ LED Bulbs: The A21 27W Dimmable LED SANSI Light Bulb. This warm-light bulb produces 3500 lumens. It retails currently at about $56.

The Philips 1220 Lumen LED Bulb: This Brightest Standard-Size Bulb has a current rating as being the very brightest LED bulb that is compatible with most household fixtures and lamps.

The SANSI 40W LED Light Bulb: The Overall Brightest LED Bulb

This is another very bright bulb, which produces 5500 lumens. It’s a non-dimmable and daylight-style bulb, meaning it’s best-suited for garages and warehouses. The current price at the time of writing is $49.

The Brightest LED ‘Warm Light’ Bulb: The SANSI 27W A21 Dimmable LED Light-Bulb

This warm-white dimmable bulb is capable of producing 3500 lumens. I personally use one of these for my laundry room, since it works out well for producing illumination that is both bright and pleasing. On the other hand, I wasn’t able to install the fan fixture I wanted on my ceiling since this light is so big. At the time of writing, this bulb was usually available for $56.

The Brightest LED Standard Size Bulb: The LOHAS LED A21 LED Light

This is a standard-sized LED bulb that produces 2500 lumens, making it the very brightest among all the standard-sized LED bulbs that are currently available. It uses 23 watts, featuring a 5000K color temperature listed as daylight white. This is a good bulb for outdoor areas and garages. If you’re looking for warm-white bulbs to use in interior spaces, read below about the Philips bulb down there.

The Brightest Warm-White Standard-Size LED Bulb: The Philips LED Bulb Which Is Equal To 100 Watts

This another standard-sized household bulb. It uses 18 watts to come up with 1620 lumens of warm-white light. I personally use these particular bulbs all throughout my home. Since the CRI is 80, they put out high-quality light. You can even dim these bulbs. Also, they’re estimated to last as long as 22 to 23 years.

You can get them on Amazon for around $21.

Notes About The Color Quality

CRI is short for the Color Rendering Index, which is a numerical system that rates the color-rendering abilities that light bulbs have as compared to natural daylight. If a light features a color-rendering index that measures 50, it’s low, meaning it’s not something that renders colors very well. However, if the bulb sports a color-rendering index falling in a range of 80 to 95, then it means it is able to render colors greatly, possibly even in excellent fashion. A CRI of 100 is considered equivalent to actual natural daylight. This is the number assigned to sunlight.

Color Temperatures are usually presented on the Kelvin scale of K. Lower-color temperatures are warmer, having a more yellow and red light. Higher-color temperatures have colder light that is bluer. Additional, a bulb’s color temperature refers to how reddish, bluish, or greenish a bulb appears. If a bulb looks more reddish, it’s likely to have a low range of color temperature, often between 2500K up to 3000K, which is often thought of as ‘warm’ appearance. If a bulb is more bluish, then the color temperature is higher, often from 4000K to 4500K, meaning it’s thought of as ‘cool’ in terms of its appearance.

  • Warm White is typically measured from 2500K up to 3000K
  • Day Light gets measured from 6200K up to 6800K
  • Cool Light is usually measured in a range of 4000K up to 4500K

To find out more, give us a call or contact us today. Please feel free to visit our blog for more related topics and articles.

A Look At Fixture-To-House Proportion & Your Outdoor Lighting In Houston

Size Matters: How Fixture-To-House Proportion Can Be Determined For Houston Outdoor Lighting Fixtures

When choosing decorative outdoor fixtures, a majority of people shop for their lighting mainly based on certain visual elements like finish and fixture style. Although the actual fixture’s design is a good starting point, another area that is equally important (and often overlooked) is the right size of the fixture in proportion to your home’s size. Fixtures may appear very large in the showroom, however, when they are mounted next to a large entryway, then suddenly they will look insignificant and small. When viewed from a distance outdoor fixtures should provide an attractive and notable presence – but not be so overpowering that they will detract from your exterior landscape’s focal points.

Our design experts compiled a few tips to help you determine the best way to approach the size for your exterior fixtures in such a way that beautifies your home and enhances your curb appeal.

Where to get started?

For entryway lighting, first, measure your front door’s height. Exterior lighting may be used for illuminating the areas around your front door should have a size that is in proportion to the actual door.

Sizing Guidelines For Entryway Lighting

When it comes to entry outdoor fixtures, the most common error is to choose lighting that is not big enough. Fixtures that are too small will get lost when looking at a house from a distance. In general, fixtures should be a size that measures 1/4 to 1/3 the front door’s height – remember that lanterns will appear to be around half the size from 50 feet away. If you happen to have to two different sizes of lanterns or sconces, the larger of the two needs to be placed near the front door (and the smaller one positioned close to the garage door).

Position Guidelines for Entryway Lighting

Along with size, the fixture’s height is another important thing to consider. In general, you should position your outdoor entryway lights at eye level. More specifically a light source’s center should be 5.5 to 6 feet off of the ground. Also, fixtures should be mounted 8 to 10 feet apart.

Sizing Guidelines for Garage Lighting

Like entry lights, the fixtures surrounding your garage should be 1/4 to 1/3 the height of your garage door. The position and number of lights will greatly depend on what the size of your garage door is.

One side lantern might be enough to illuminate your one-car garage. If you have a two-car garage, you can position lights on both sides of your door. For extra illumination, position the third light in the center over the door – but make sure it is positioned high enough so that it doesn’t interfere with the regular door functioning.

A third option that can be used on a two-car garage is to place the fixtures over the top of the garage door to produce even illumination.

Sometimes outdoor home lighting may feel like it is a utilitarian home project, and it is approached by too many companies as a technological chore. The LED outdoor landscape lighting that we offer combines function and form that provides landscape lighting solutions can do more than just light your yard up. To create the very best LED landscape lighting involves the work of the design team at Robert Huff to bring collective architectural designs and to employ the latest solutions for LED outdoor landscape lighting solutions.

Our team often works with pool designers, architects, and landscapers to create Robert Huff’s renowned light effect for your business or home’s outdoor space. For more than 30 years, Robert Huff Landscape Illumination has designed outdoor home lighting with Security, Elegance, and Beauty. We also specialize in designing and installing commercial LED landscape lighting. Robert Huff customers trust us because we deliver outstanding designs in residential and commercial outdoor lighting in Austin and Houston, TX.

If you have any immediate questions please feel free to call us today or contact us now and one of our representatives would be happy to help you!

Tips For Safely Installing Temporary Outdoor Lighting

11 Safety Tips For Installing Temporary Outdoor Lighting

When it comes to the outdoor lighting in and around our properties, most of us have some lights that they control, such as the security and porch lights. The other options are under public lighting. But some of the outdoor lights will serve as a decorative installation such as what we see on houses during Christmas and Halloween holidays.

Safety is a huge concern for every homeowner. We want our family, pets, and guests to feel safe whether their stay is short or long. As such, the availability of ample power cords, bulbs, and controls to ensure that you can manage the outdoor lighting becomes a significant investment for our gardens.

Many people have little to no regard for the importance of observing safety when installing outdoor lighting, especially if it is a temporary setup. They will not struggle to ensure everything is put up correctly and is up to code since they are not going for permanent installations. However, electricity and power connections are not a simple matter that you can handle as a triviality; they are always a danger. It is for this reason that the National Electrical Code has requirements for temporary electrical installations that are in line with the standard guidelines.

As such, safety comes first when you think of installing outdoor lighting in your yard. Therefore, you need to implement the following tips:

1. Install Outdoor-Rated Fixtures

Any lighting fixture you want to set up in your outdoor spaces should be built and designed for such a location and purpose. For instance, the porch lights are installed under the roof thus are never meant to get wet, but if you need to pick the type that designed for outdoor applications since it is bound to get damp and face fluctuation of hot and cold conditions.

Another example is the wall lighting fixture that will go next to the door. It may not have a protective cover and as such should sustain high impacts up to a certain degree and have high weather resistance, especially if it will be used on the exterior walls.

2. Use Outdoor-Rated Light Bulbs

Use the wrong type of bulb for exposed lighting fixtures such as the floodlights can you will be replacing it regularly. What works for the porch lighting will not suffice for the exposed installations. You should think about the life of the bulb even as you check its outdoor usage rating. Read the product description of some of the products, it the bulb can survive extremes such as the heat in an oven or the cold of a freezer, then it probably will work for outdoor purposes.

3. Avoid Using Metallic Binding Materials

When installing any lighting ornaments and wires, you should avoid damage the wires or using materials that are metallic for binding. Metal is an excellent electricity conductor. You should opt for materials such as plastic ties which are inexpensive, safe, and a popular choice for such jobs.

4. Use Outdoor-Rated Extension Cords

Extension cords will help pull the electric up to specific points where you want to install the lighting. However, you should only use the extensions cords that are made for outdoor applications. The indoor variety tends to be light and very flexible thus less robust for any outdoor use. You should use outdoor-rated extension cords only, even if you are putting up temporary lighting set up in your yard.

5. Avoid Over-lamping” A Fixture

Most lighting fixtures have a label or sticker that states the maximum wattage. Some will read 45W, 60W, and others 100W. Always abide by what the labels say so that you do not install the wrong bulb that will overheat the fixture’s wiring damaging the insulation of the wires. The indication on the stickers denotes the wattage you need to check for the bulbs you installed. For instance, if you opt for a CFL bulb in a 60W fixture, then you choose one the uses up any amount of power that is less than or equal to 60 watts and is amount to generate a higher illumination (light) than a 100W; 200W incandescent bulb.

6. Use Decorative Lights Made For Outdoor Use

If you need lighting for decorate purposes such as to light up skulls and pumpkins during Halloween or make the home showcase the festive mood of Christmas, then you should check the labeling to ensure you are using the right kind of lights. They should not be for indoor purposes. Pick the type that reads it is for an outdoor or multipurpose (outdoor/indoor) application.

7. Fit Weather-Resistant Receptacles

Ensure that you have outdoor receptacles installed for your power source options, even if you are working with temporary loads. It is a safer and a more presentable means of getting the power you need from one point to the outdoors instead of running a cord through the window or the doorway that can even cause someone to trip and fall over. You may benefit from especially covers for the wire; you also set the same for the receptacles. But with the receptacles, they should be able to handle hot, cold, and damp condition, meaning they should have a high weather-resistance rating.

8. Invest In GFCI Protection

The use of a Ground Fault Circuit Interrupter, or GFCI in short, is a protection measure. You should install GFCI power outlets in any section of your home where you might need to plug something in and still have a grounded electricity delivery. GFCI should be installed in the basements, kitchens, garages, bathrooms, attics, crawl space, and the porch for when you need to pull some electricity to your garden.

If the power feeds for your outdoor receptacles have GFCI protect that can be from a GFC device upstream or the circuit breaker, then you can work with a regular weather-resistant receptacle. But if that is not the case, then you should install a weather-resistant GFCI receptacle.

9. Cover Receptacles In Damp Locations Under A Roof

If you have the outdoor receptacles installed in an area that is protected from direct weather elements, you can cover them with a trap door that stays shut when nothing is plugged into that point. Make sure that you use covers that are rated ideal for damp locations and conditions.

10. Install A Cover For Exposed, Wet Locations

If the outdoor receptacles are installed in locations that have them exposed to the elements, then you should cover with an “in-use” cover. It will keep the receptacles and any attached plugs dry and shielded from the rain.

11. Watch Out for Flammable Materials

Avoid installing the lights next to materials catch fire quickly, especially if you are using lighting materials that produce heat. For instance, the decorative lights you need for the manager can see you use an accent light and still create the desired effect. Take some time to consider your decorative materials and plans so that you can planning for the lights accordingly.

If you would like to discover more tips and tricks from Robert Huff Illuminationsvisit our blog. Call or contact us today for more information!